

Question: What is the difference between an analog multimeter versus a digital multimeter?
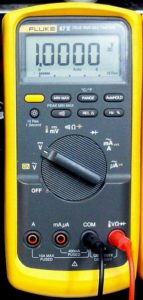
Answer: Quite simply, analog multimeters display the values on an analog dial. Analog multimeters have an actual hand that moves like a clock, whereas, digital multimeters display output values on a digital screen. Analog multimeters tend to be more inexpensive and simpler and offer fewer test options, whereas, digital multimeters have become the standard for automotive repair diagnosis in 2018. However, if you are a DIY mechanic or working on small-engines specifically an analog multimeter may be the better choice.
Today’s digital multimeter offers a ton of test options and settings. Analog multimeters lack a lock of these bells and whistles but tend to be cheaper, more reliable, and less fussy.
I spoke with both automotive mechanics and small engine mechanics who both recommended different multimeters.
Table of Contents
Main Differences Between Analog and Digital Multimeters:
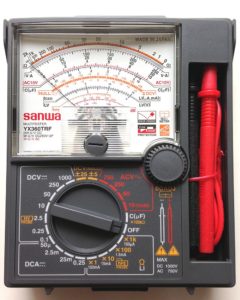
- Analog Multimeters display values on an analog screen (you can watch the physical needle move)
- Digital Multimeters tend to have more options and different tests. They can also store in their memory certain readings that make it easier to work alone on cars.
- Digital multimeters display values as numbers on a screen:
Both come in a variety of prices and styles with tons of different options/tests you can use them for.
I am not an electrician and most of the stuff I do with a multimeter is Ohm (resistance) testing or Voltage readings.
I would say that 95% of the time you will only be doing those two tests, with both giving you very valuable information. The other 5% of the time, if you’re working on cars often you will want to have all the functionality of a high-quality digital multimeter like the beloved Fluke 88 by car mechanics.
Digital VS. Analog Multimeter: What Should You Buy in 2018?
Really, you are okay with either one as long as you get a quality brand and you really learn how to use it. I really enjoy actually owning both, as I typically use my analog multimeter for small engine repairs, and my digital multimeter for car diagnosis.
For automotive repair, many of the features on a digital multimeter will come in a lot of handy. You can do a lot of the same tests with an analog multimeter but it lacks a lot of the computer style memory functionality that a digital meter does.
Meaning with an analog meter you can be stuck not being able to do a test because you don’t have an extra set of eyes to watch the multimeter while you start the car etc.
With a digital multimeter, you can tell it store data and use it as a second set of eyes. This comes in handy when say you want to test the voltage drop while starting the car. It can be hard to see how low the multimeter drops just by watching it, but many digital multimeters come with a setting that will store the high/low voltage readings. Simply hook it up, start the car, and then go check how low the voltage got. Pretty cool!
What Can You Do With A Multimeter for Car Repair?
Testing batteries:
- Connect the positive and negative lead of the multimeter to their respective parts of a battery to see how many volts it is putting out.
- Typically a fully charged battery, one capable of starting a car or motorcycle, should be showing at least 12.3 or so volts.
- If you are getting any less than this, then the battery is likely discharged and needs to be charged.
- Consult the chart below to see a general guideline for your batteries voltage and state of charge. However, this one reading will not tell you if your battery is actually “good” or not. You will need a battery tester to really test a batteries health, read more on battery testers here.
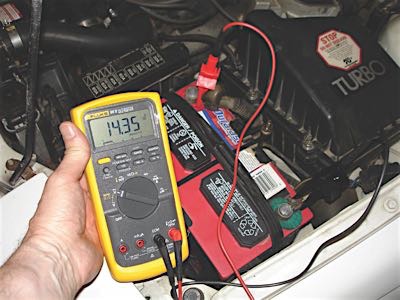
Testing any charging/alternator/stator system (car/motorcycle/scooter):
- Connect the leads of the multimeter correctly (positive to the positive terminal of the battery, negative to negative on the battery or a well-known ground).
- Start the car or scooter, and look for the voltage to increase to the specified level in the factory service manual.
- On cars/trucks/anything with a 12v battery system.
- With the engine running the alternator should be charging the battery around 14-14.4volts.
- If the reading does not change at all, then likely the alternator is bad, a connection is shot, or the belt is broken for the alternator.

Does this show the alternator is charging the battery? - On some small scooters or motorcycles, it may take you blipping the throttle to see the voltage increase.
- On cars/trucks/anything with a 12v battery system.
Also to note, on my friends old VW rabbit diesel, the alternator would not start working until you got the RPMs of the car past a certain amount (2,000 RPMS I believe).
So, if you just started the car and took a reading it would show the alternator not functioning correctly, but the second you drive the car it would switch on and work perfectly.
Be sure to just blip the throttle on your car to make sure you don’t have something like this going on.
You can also tap on a suspected bad alternator with a hammer or block of wood and see if it suddenly starts working.
This is only a temporary fix but is another sign of internal damage to the alternator (meaning it needs replacement).
Testing Continuity:
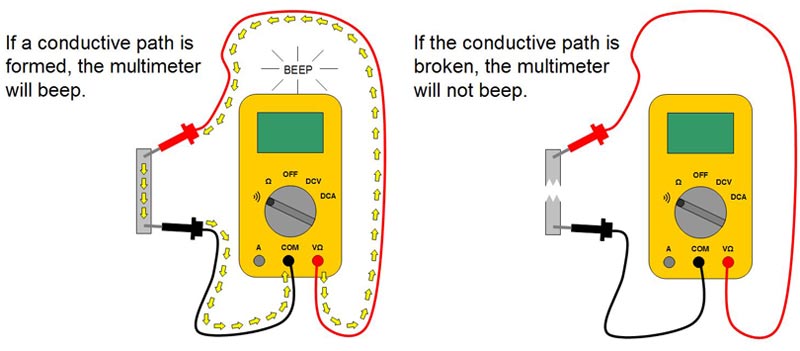
Put simply this means you can figure out where one wire goes. To do this:
- Simply put your multimeter on the ohm setting (read the manual if confused) and touch the two leads of the multimeter together.
- You should see the reading on the meter read “0” if it is digital, and if it is analog it should deflect fully to the right to signify no resistance.
How to use Ohm or Resistance Testing for Car Repair:
You may be wondering how mechanics use resistance testings on cars. There are many different ways to use resistance testing but here is the one most commonly done.
Ever wonder where that wire goes that goes into a wire loom?
- Simply connect one lead to one end of the wire that you can access, then probe the other wires using a sharp needle and wait till you see the resistance drop.
- You now know that when that resistance drops that those two wires are the same. That is probably harder to visualize by reading, but for a beginner lesson on Multimeters check out this youtube video.
To check if fuses are blown or good quickly:
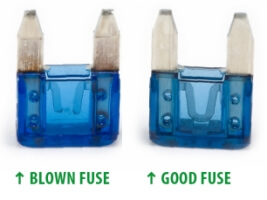
- Simply connect the ground on the multimeter to a solid ground.
- Then turn the ignition to on, or so the fuses have power and check each side of the fuse for a jump in the multimeter.
- If it only jumps and shows voltage on one side, but not the other, then pull the fuse and visually check to see if it is bad.
- You can fly through the fuses this way, instead of pulling and checking each one individually.
- A test light also works for this (arguably faster too).
Small Engine No Spark Diagnosis:
This is where I really learned the difference between the benefits of using an analog multimeter vs. a digital one. I was having trouble figuring out why I had no spark on a chainsaw. I took it to a local old-school small engine mechanic who asked if I had checked the connection at the spark plug to the coil. I said I had, and his next question was whether or not I was using a digital multimeter. I replied I was, and he then quickly busted out his analog multimeter and showed me that I wasn’t actually getting a connection between the wire and the spark plug.
It took him two minutes to diagnose and fix it with a new spark plug cap and reconnecting the wire from the coil.
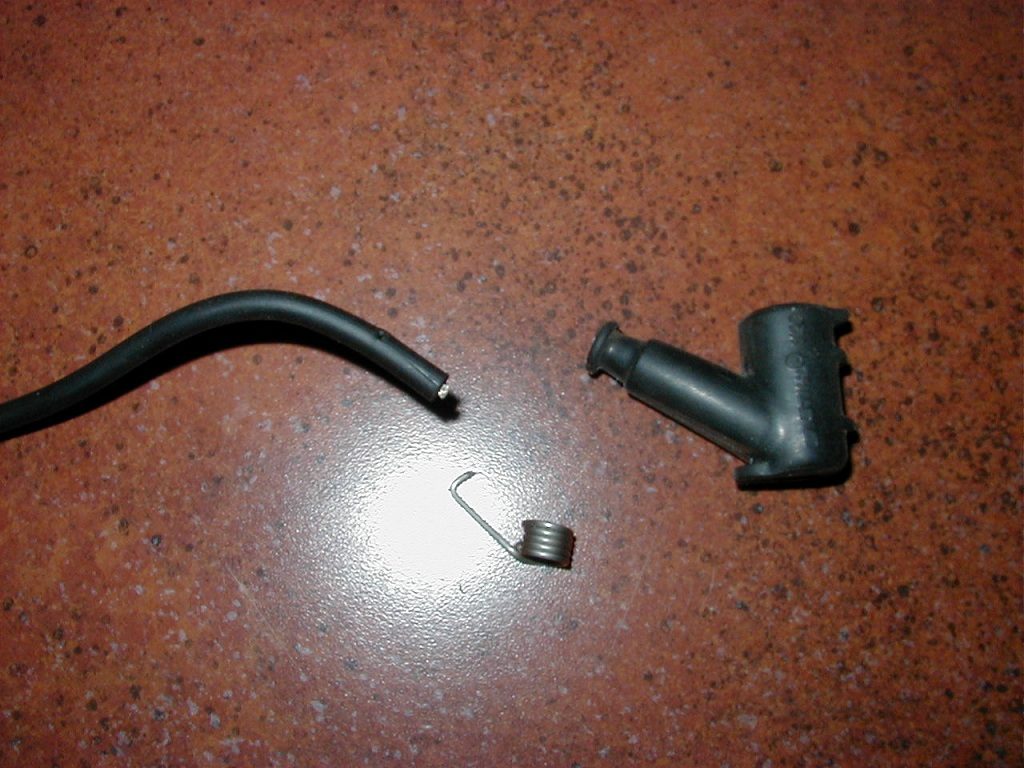
A lot of times the wire that goes to the spark plug will become frayed or damaged.
People replace coils all the time without actually realizing the only issue is the actual connection between the spark plug wire and the actual metal cap that goes on top of the spark plug.
Why I love my analog multimeter, and why other old school guys do too:
- An analog meter tends to be less spastic I have found with doing DC voltage stuff. It can be hard to get a digital multimeter to “calm down.”
- The numbers bounce around rapidly as the connection varies.
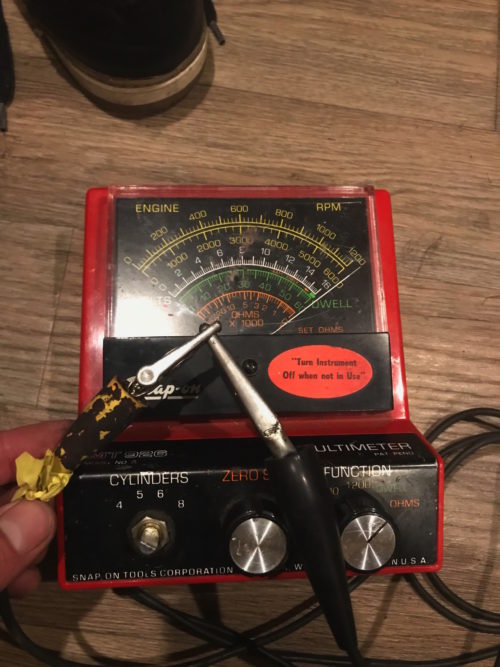
- I had a $200+ fluke multimeter that got stolen, and while it was an awesome tool (which I highly recommend).
- I have since replaced it with an analog old-school Snap-On multimeter with little to no difference to me.
- An analog meter I have found to be more useful for testing continuity in small engine spark plug wires, and just wires in general. Like I said before the multimeter has a very physical response when the resistance drops to zero. You can literally watch the arm swing drastically and rapidly. It can be easier to read for beginners.
The local small engine repair shop guy I go to for help with random repairs once scolded me for using a digital multimeter.
He is a little bit of a rough around the edges guy, but he swears by an old-school analog multimeter.
For simple jobs, use a simple tool he argued.
And quite simply, I agree with him.
I really love the feel of my old school snap on analog multimeter I picked up at a garage sale.
Here are both Digital and Analog multimeters I’d recommend:
- Definitely grab one of these analog multimeters, if you like the idea of easy reading. Here’s one I found that is highly reviewed and a pretty affordable analog multimeter.
- One of my favorite digital multimeters that is a bit more expensive and higher end. Fluke makes awesome multimeters. The Fluke 117 is a great way to get introduced into digital multimeters, but if you want the multimeter that the professionals use then get the Fluke 88
 . That is the industry standard, and I found a pretty awesome price for it on Amazon here.
 . That is the industry standard, and I found a pretty awesome price for it on
 Conclusion:
Overall a good multimeter is a must have for every mechanic, technician, or home DIYer.
I don’t go on any road trip without mine and use it constantly. It gives you the information you need to be informed and quickly diagnose common issues.
Whether you choose digital or analog you can’t go wrong if you understand how they work & the drawbacks of each type. Check twice or three times, buy the right part just once.
Accessories that are extremely useful to have for your multimeter:
- Soldered Aligator Clip Leads.
- If you do spring for the Fluke multimeter, this deluxe kit will definitely come in handy
- These awesome Lisle 6150 flexible back probes. It can be a battle to probe some wires. But with these they make it easy as you can bend them to the angle you need. Trust me, these will make your life easier over time.
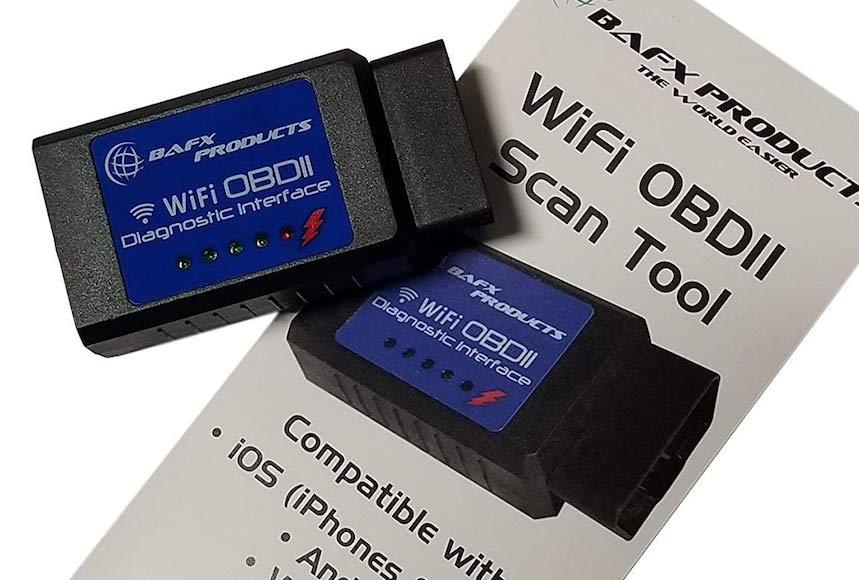
Most importantly don’t fall for these Gimmick Tools of 2018. Click here to read what tools to avoid and what to actually spend your money on.


Pingback: Buying Guide: Top Battery Testers & Why They're Better Than Just A Voltmeter - AGradeTools.com
Pingback: Buying Guide: Top Battery Testers & Why They're Better Than Just A Voltmeter - AGradeTools.com