If you are looking for the complete guide to doing this yourself click here. That has everything you need to know about the steps and what you need to order.
This is just going to be some things I noticed from when I did it yesterday on my 2001 Toyota Prerunner V6 (2wd).
I did not need to remove the sway bar at all to replace the bushings. In fact, I would recommend not removing the sway bar and not removing either of the tie rods ends.
Table of Contents
Here are the steps I did to replace the rack and pinion bushings on any 1995.5-2004 Toyota Tacoma:
- Jack the vehicle up and support it with jack stands.
- Take off both front wheels with 1/2″ impact gun (or use a breaker bar on the ground first) 21mm socket
- Remove the two 19mm fasteners on the slip over collar bushing. Pull the metal piece off.
- Next, remove the top 19mm fastener (from the top) it is a bolt that goes down through a captive nut. Do not try to remove this one from the bottom– the nut is captive (welded) on to the frame.
- Remove the large 22mm pass through bolt (the long one that goes through the biggest bushing). You will need a 22mm socket and something to hold the nut (which goes on the end facing the front of the truck).
- Now the rack should be free and you can muscle it out towards you.
- Use a razor blade to cut off the outer lip of the old rubber bushings in the rack and pinion.
- Take a propane torch and here is the pro tip: heat the old bushings up and make them soft!
- Once they are good and soft (lots of heat) use a dead blow hammer and an assortment of extensions/sockets to bang them out of the bores. You should see the smoke! Use a respirator, safety goggles, and have a fire extinguisher handy.
- Heat and a dead blow hammer are your best friend. Work all the bushings out using same steps (cut with a utility blade, use a torch, and a dead blow hammer them out!).
- Grease the crap out of the bores left in the rack and pinion with synthetic grease (doesn’t react with rubber). Grease the insides of the sleeves and outsides. Literally, you can’t use too much grease here as long as it is 100% synthetic or silicone.
- I used the dead blow hammer once again to get the metal sleeve through the new bushings (the rubber parts are easy to get started in the bores– the hard part is getting the metal sleeve to push in).
- Do not worry about the sleeve pushing a bit out, get the sleeve started and drive it in with your dead blow hammer until it seats relatively flush. Use an extension and a socket to get it started if the angle is weird with the sway bar still installed. It doesn’t need to be perfectly straight at first, just get some blows to get it started (it will straighten out as it goes in). Make sure the bushing stays seated and if it starts to back out, keep it pressed against something that doesn’t allow the bushing to push out (use the frame of the truck).
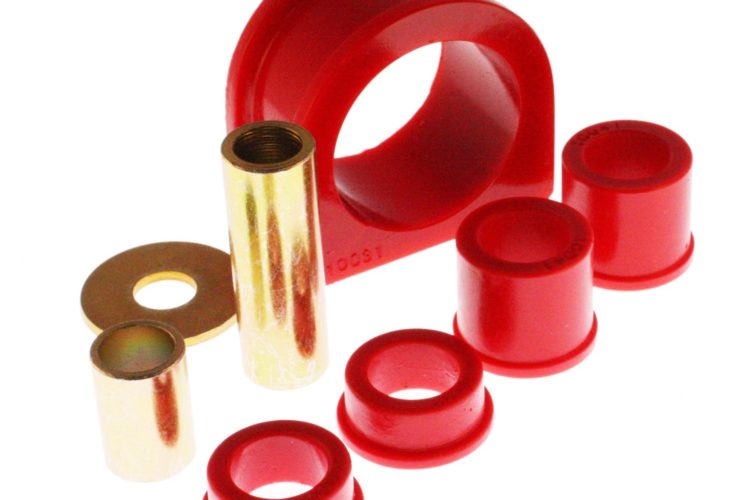
- First, get the large long bolt pushed through and add the large washer between the rack and pinion and the frame (the washer is part of your new Energy Suspension Bushing Kit).
- Start the nut on the end and begin tightening the large bolt first (just to 50% tightness) until it sucks the bushing in place and the rack starts seating correctly.
- Next, add the collar joint with the bushing and finally get the last 19mm bolt started from the top down.
- Tighten everything to the torque specs from Toyota and enjoy your much tighter steering.
Conclusions:
- Having a dead blow hammer is very useful.
- You do not HAVE to remove the sway bar (and it isn’t necessarily easy to do). You can save time and hassle by leaving it completely in place.
- A torch is basically essential if you are working on the ground and want to remove the bushings easily (old ones).
- Synthetic Grease will make reinstall hecka easy.
- Do not battle the metal sleeves going into the bushings. Use your dead blow hammer and just get them started then wack them until they seat. You can also use huge pliers here (but I don’t have ones that big)
- You will want to retest your steering system for play after fixing the bushings. Problems that were masked (like bad tie rod ends) may now be more noticeable due to the bushings not having so much play.
- Total time should take around an hour to do this. If you use a torch and dead blow hammer. Without either of those, this job would have been much more difficult. The torch makes removing the old bushings 100 times easier!
Be safe!
Parts & Tool Recommendations:
The Energy Suspension Kit for 1995.5-2004 Toyota Tacoma’s that I recommend is the Energy Suspension 8.10103R 4WD RACK & PINION BUSHING SET (it fits the 2wd Prerunner version as well). It was confusing for me as well, but they are the same bushings the posting is just confusing (read the Amazon questions if you are concerned about fitment).
Here are some bomb and budget synthetic grease you can use to lubricate the bushings (and for tons of other automotive uses). Click here to buy it on Amazon— it is a great deal. You will be amazed at how many auto parts stores don’t know what you are talking about when you ask for “synthetic grease.” Just trust me, buy it online.
For a dead blow hammer, you can’t go wrong with harbor freight even. Or grab a more robust set on Amazon that is similarly priced here . I love having a dead blow hammer— and for this job it is essential. Why? Because unlike a regular hammer all the force would be lost on the rubber bushing when you hit it. But a dead blow hammer helps keep the momentum moving forward and it works great for this kind of thing.
Last Pro Tip: If you are in any kind of rusty state, or just want some added protection PLEASE soak the crap out of all the bolts with penetrating oil before starting. People on Amazon have snapped some of these welded nuts (captive nuts) and that will make the job 10x times harder. If that happens you will need to cut access and fit a washer and nut in the space instead (big/expensive pain in the butt).
SOAK IN PENETRATING OIL FIRST! USE TORCH WHEN POSSIBLE.
Don’t have a torch? They are cheap and hecka useful. Here is a PERFECT one for a DIYer . You can buy the gas at any hardware store and use whatever you want (propane, butane, etc). You want one that has an easy on-off click sparker. You will be under a car using it, trust me you want it to be easy to turn on and off.
Video Guide:
In this video he has the sway bar removed– you do NOT have to remove this to get the job done. But it will make life a little easier.
This is what I mean when I say using a torch right will make job 100x easier:
Sure, these aren’t the rack and pinion bushings– but the same principles apply. The heat will literally melt the rubber bushings enough that pushing them out becomes sooooo much easier. I can’t stress it enough a torch is your best friend on this job!
How To Tell If Rack and Pinion Bushings are Bad Toyota Tacoma:
- Move steering wheel left and right quickly in short little movements.
- Get under the car.
- Look at the bushings on the rack and pinion.
- Are they moving a lot? Shifting?
- They are bad if they shift a lot. They are ok if they don’t let the rack move much at all.
Watch the video above to see a bad steering rack bushing on a newer Tacoma. Same rules apply for any rack and pinion— this much play and the bushings are bad!